Deploying Your Client Sites
This setup uses a deployment strategy by Sharath Vignesh explained here.
Github Actions Setup
-
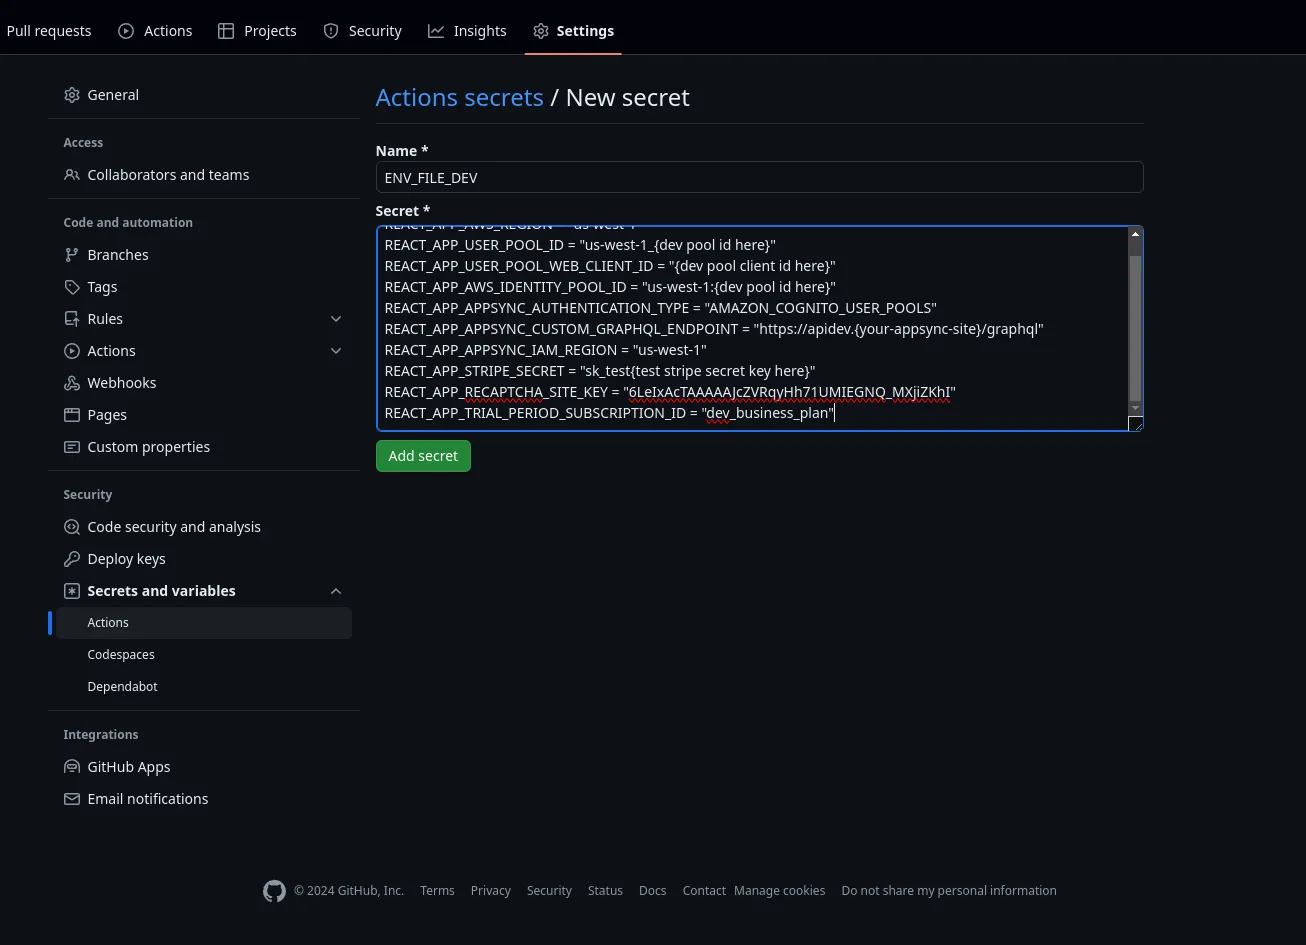
Create Github Secrets for Actions. In your github project for the following Workflow variables:
ENV_FILE_DEVENV_FILE_GREENENV_FILE_BLUEEach of these Github Secrets need to contain all of the variables and values found in the .env file you’ve just edited. Keep all the vairables safe somewhere on your local computer because once saved in Github Secrets you will not be able to view them again. See screenshot for reference:
-
Create seperate Github Secrets for each of the variables below. These are used in the Github Workflow templates which can be found in the .github/workflows folder:
AWS_BUCKET_NAME_DEV="dev.{your-domain-name}"AWS_BUCKET_NAME_BLUE="blue.{your-domain-name}"AWS_BUCKET_NAME_GREEN="green.{your-domain-name}"AWS_ACCESS_KEY_ID="{access key from step 11}"AWS_SECRET_ACCESS_KEY="{secret access key from step 11}"AWS_REGION="{default us-west-1}" -
Run:
npm update --legacy-peer-deps -
Create three new branches after creating the main branch:
git checkout -b devgit checkout -b greengit checkout -b blue -
Push the three branches: dev, blue, and green live.
git push -u origin devgit push -u origin bluegit push -u origin green -
After a few minutes wating for the github actions (see them running under the github.com
Actionstab) you should be able to navigate to your live website. -
running
npm startwill launch the local copy, but it uses the variables stored in the env file, so it is possible to switch between the dev, blue, and green stacks locally by commenting/uncommenting the block of variables (the live dev stack is the default)